|
|
|
Kto jest w sklepie?
Sklep przegląda 5756 gości |
|
Kategorie
|
|
Informacje
|
|
Polecamy
|
|
|
 |
|
|
Dla tego produktu nie napisano jeszcze recenzji!
 ;
Schematy są ale można wysilić się i zrobić kolorowy skan i o większej rozdzielczości. Wtedy schematy płytek będą czytelniejsze. Całość super jako wartość merytoryczna. Wszystkie dane potrzebne do podłączenia różnego rodzajów urządzeń takich gramofon, CD itd.
 ;
Szybko, sprawnie i tanio. Serwis godny polecenia. Będę polecał innym
;
Ogólnie jest OK, z wyjątkiem obrazu płyty głównej, który jest miejscami mało czytelny, ale można sobie poradzić.
;
Dokładna dokumentacja, pomogła w szybkiej naprawie telewizora. Dziękuję!
;
jedyne do czego mogę mieć zastrzeżenie to jakość zdjęć zawartych w przesłanej instrukcji serwisowej ponieważ są fatalnej jakości, praktycznie nieczytelne. tak poza tym jestem zadowolony to jest to czego szukałem.
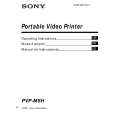
Inserting the print paper
Be sure to use the specified print paper. The descriptions in this manual are for the DCR-TRV30. For details on camcorder operation, refer to the operating instructions of your camcorder.
Inserting the print paper (continued)
PNotes
� The print paper will not be automatically drawn in unless it is firmly inserted as far as possible and the print paper is lightly pressed for about two seconds. � Do not insert print paper from the opposite side of the paper feeder or from the paper dispenser. Doing so may cause this unit to malfunction. � Do not insert print paper at an angle. Doing so may cause this unit to malfunction.
1 2
Perform steps1 and 2 on page 12, and prepare the power supply. Make sure that the PAPER lamp is flashing slowly, and then insert a sheet of print paper into the paper feeder straight making sure that the print surface is facing up.
Insert the print paper until less than 3 cm of print paper is protruding from this unit. Press the print paper into the paper feeder for about two seconds after the beep. The print paper starts to be automatically drawn in.
Turn off your camcorder once, and then set again to MEMORY. The print paper is automatically ejected. Pull out the print paper in the direction of the arrow.
To remove drawn in print paper
Preparation Making prints Standard print
Less than 3 cm
PNote
Do not pull out drawn in print paper forcibly. Doing so may cause this unit to malfunction.
� When the CARTRIDGE lamp is flashing slowly, check the print cartridge. � If print paper is not inserted, the PAPER lamp flashes slowly. The PAPER lamp flashes fast when an error occurs. PNote
After you have inserted the print paper, do not close the printer cover until printing ends. Doing so may cause this unit to malfunction.
Supplied print paper
Your printer is provided with the following print paper. Select the paper type to suit your specific requirements: � Standard type � Sticker type/Standard size � Sticker type/9 split size
13-US
14-US
BMaking prints - Standard print
You can print images whenever you want to or print images recorded on �Memory Stick.�
Printing images whenever you want to (continued)
6
Printing is started.
The image on the LCD screen disappears. During printing, the print lamps 1 to 4 light in order, and the print paper is fed back and forth four times. When printing ends, the image appears on the LCD screen. It takes about 160 seconds to make a print.
Printing images whenever you want to
Be sure to use a fully charged battery when using the battery to make prints.
1 2 3 4
Insert the print cartridge and attach this unit to your camcorder. Set the POWER switch on your camcorder to MEMORY. Open the printer cover, then make sure that the PAPER lamp is flashing slowly. Insert a sheet of print paper. Keep pressing PRINT lightly until a still image appears.
The CAPTURE indicator appears.
CAPTURE
7
When printing ends, draw out the print paper in the direction of the arrow.
PNotes
� The image area of the printed area may differ slightly from the image on your camcorder or TV. � The quality of printed images sometimes deteriorates considerably or printing is not performed if prints are made at a high temperature exceeding the guaranteed operating temperature range. � The possible number of prints is sometimes reduced if prints are made at a low temperature exceeding the guaranteed operating temperature range for the battery pack. � The color of printed images sometimes changes slightly depending on the ambient temperature conditions during printing. � The possible number of prints is reduced if you use a battery with little remaining battery power.
5
Press PRINT deeper.
PREPARING appears on the LCD screen.
PREPARING
While the ribbon is being aligned, the print paper is sometimes inserted and ejected from the left and right sides of the body without the LCD screen turning off even if POWER lamp lights. The image on screen when PRINT is pressed in is printed. This image is not recorded on �Memory Stick� or tape.
15-US
16-US
1-3
|
|
|
> |
|