Schematy są ale można wysilić się i zrobić kolorowy skan i o większej rozdzielczości. Wtedy schematy płytek będą czytelniejsze. Całość super jako wartość merytoryczna. Wszystkie dane potrzebne do podłączenia różnego rodzajów urządzeń takich gramofon, CD itd.
jedyne do czego mogę mieć zastrzeżenie to jakość zdjęć zawartych w przesłanej instrukcji serwisowej ponieważ są fatalnej jakości, praktycznie nieczytelne. tak poza tym jestem zadowolony to jest to czego szukałem.
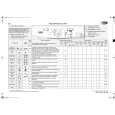
Tekstowy podgląd strony 63 (kliknij aby zobaczyć)
3-1-4. JD-43 Board
1. Remove the upper cabinet assembly. (Refer to Section 2-2-1.) 2. Remove one screw, then remove the JD-43 board. 3. Disconnect one harness from the JD-43 board.
3-1-5. PE-43 Board
1. Remove the upper cabinet assembly. (Refer to Section 2-2-1.) 2. Remove the DK-43 board. (Refer to Section 3-1-1.) 3. Remove the hook securing the PE-43 board in the direction indicated by the arrow, then remove the PE43 board. 4. Disconnect one harness from the PE-43 board.
Harness MD-43 board P 2x3
JD-43 board
Hook
4. Attach a new JD-43 board in the reverse order of steps 1 to 3.
Paper feed frame assembly Harness PE-43 board
5. Attach a new PE-43 board in the reverse order of steps 1 to 4.